Showing posts with label interior design. Show all posts

Thursday, June 30, 2016

Moss Balls Are My Jam

I recently started incorporating greenery (faux of course because I kill everything) into our home. From wreaths to succulents and now moss balls. Let me be honest, moss balls can be expensive! And of course I wanted the big ones so I knew I was going to have to pay a pretty penny. Or not. My sweet coworker knew I was on the search for the perfect, medium to large size, cost effective moss balls so when she came across a bag for $7.99 at TJMaxx she asked me if I wanted them. Um, of course!!


Now I"m placing them just about everywhere. : )


Tell us where you find your favorite faux greenery!


Best,

Heather

Friday, February 6, 2015

Coop Makeover

When we started house hunting I was always drawn to the fixer uppers. The ones that once upon a time had their glory days. The ones that have squeaky floors. The ones that despite the awful shape they are in they still stand a chance. The ones with character.
            Ah, character. The one thing that I don’t notice when I see newly built houses. Now don’t get me wrong, I don’t hate new houses. They are perfect in every way. Every wall color, trim design, and flooring selection match perfectly. They’re beautiful. But they lack character. Now don’t be upset if you live in a new house. There is just something about the design of older homes that doesn’t exist today.
I wanted a fixer upper. The hubba hubba wanted something with minimal to no fixes. Let me just explain the issue I have with this. My husband is a carpenter. He can fix pretty much anything and he does an excellent job at it. So why not want to come home after a long day at work and work some more to make our fixer upper livable? Yea, I wasn’t going to win on this one. So we decided to change our search for something that was older but was livable and we were able to add our own character to.
            The house hunting wasn’t as fun as I thought it would be. It was heartbreaking. We were in negotiations for the house that I thought I couldn’t live without when someone else placed a bid during our negotiations and the seller took their offer. I was devastated. I didn’t think I could find another house as perfect as this one, yet I was wrong. We had been looking at houses online when we found one that the hubba hubba could not wait to see. He was so impatient and excited about this one that he couldn’t wait for me to get off work. He drove by it that night and called me to say, “it’s the one.” The next day we had our realtor meet us at the house and I was just as excited. The hubba hubba was right it was the one. After a month, we closed on our first home together.
            Instead of moving in right away, we started working on the house. Chris spent the first month installing new hardwood flooring (one my of must-haves) and painting the entire upstairs. Side note: the hubba hubba did a vast majority of this by himself, he’s a keeper! Once the floors and walls were done, we were able to start moving in. I had been collecting several furniture pieces and accessories waiting to buy my first house. I even kept them all in boxes so it would be like Christmas when we moved. If you are able to do this, I highly recommend it! Once we placed what he did have we started working on one room at a time. With the exception of the living room, the office was the first to be completed.
            I started collecting items that matched my style and designing in my head how they would all go together.
            The desk was made from an old door and metal found while junkin’. The colors on the door and metal worked perfectly together (see original post here).
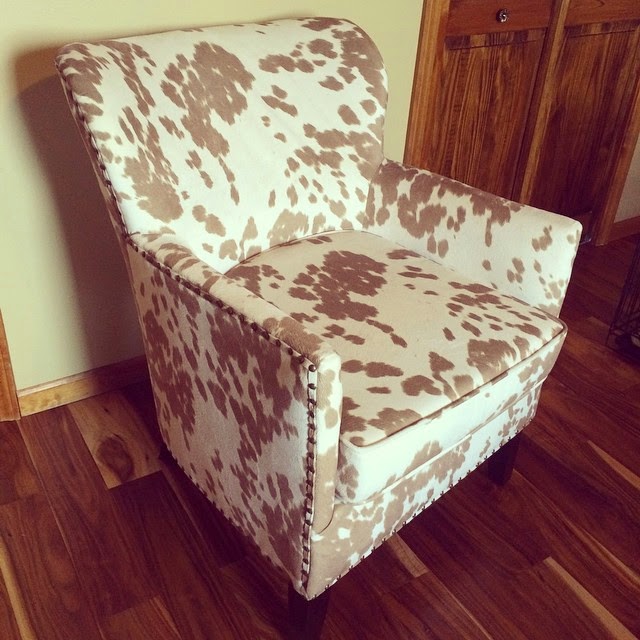

            I had a harder time deciding which chair would be perfect in this room. Fortunately, I was able to get both chairs I had narrowed down for this space. 


            I always wanted a mantel (see post about my mantel here) and was able to grab this beauty up at First Fridays in the West Bottoms.


            Another great find was this rusty filing cabinet. As soon as I saw it I knew I had to have it. I have had several people ask if it is functional, and it is! The rust is contained to the outside so the drawers work perfectly!

            My gallery wall (see original post here) is made up of a majority of items I found while junkin’. With the exception of our gorgeous wedding photos (Thank you Aftyn Marie Photograph!).  


Below is the before (with the previous owners belongings) and the after! It is amazing to me the huge difference!


            Whew! That was a lengthy post just to get to our office make over. Let me know what ya'll think!

Rather be junkin'!
Heather

Tuesday, January 20, 2015

TYPOGRFX Feature

            I am so thrilled to feature TYPOGRFX on The Rustic Coop! TYPOGRFX is a custom collection of meaningful memories and experiences that can be featured on several different formats. My favorite is the wood & burlap print! Other formats available are metal, wood, canvas, and even blankets!
            Tosha Jackson, the owner of TYPOGRFX, was amazing to work with and incredibly talented.  She has been featured in Country Living Magazine, nominated for the Martha Stewart American Made Awards, and even documented and shared her journey to try out for Shark Tank.
We received our first TYPOGRFX as a Christmas gift in 2013 shortly after we got engaged. Chris and I had been dating for 7 years and were excited to place our favorite memories, wedding date, and words that best described us on display in our home.  It was fun to reminisce memories and use our favorites in our TYPOGRFX. Our custom TYPOGRFX is one of the first things you see when you walk into our home. Now, every time I need a gift for a friend or family member, I order them a gift card to TYPOGRFX for them to create for their home. (Especially those with new little babies!)
            Check out TYPOGRFX today for your own piece of rustic décor and be sure to tell her Heather from The Rustic Coop sent ya!


Rather Be Junkin',
Heather


Monday, January 12, 2015

It's A Gallery Wall Ya'll!

I’ve been working on our home office for a little while now and have finally gotten to wall decor. I’m not sure why, but hanging wall décor has always made me nervous. I’ll be honest, I can be a bit indecisive and putting a hole in my wall makes me a little uneasy. What if I change my mind? Then I put a hole in the wall for no reason. That is probably the reason I’ve taken my time on putting up this gallery wall.
I started collecting items from my junkin’ adventures that would work great with some photos I wanted to hang. I laid out all of the items and started moving them around until I was certain I liked the arrangement.  When I told Chris I was ready to hang I forgot that my junkin’ items weren’t typical wall décor and they didn’t have hooks. Whoops. Hubba hubba to the rescue, we placed hooks on the back and were ready to go!
The drawer, plinth, large metal shelf, and grain belt were all found while junkin’. I received the large frame as a gift and purchased the canvas from Canvas People. (If you haven’t checked out Canvas People yet, you’re missing out!)

I’m so excited with how it turned out and am glad that I didn’t put any unnecessary holes into the wall, either!


Rather Be Junkin'
Heather

Friday, January 9, 2015

Wallpaper Pulling SOLVED

I hate pulling wallpaper. There is nothing fun about thinking you have a big chunk of wallpaper coming off for it to only rip and it’s the size of a penny. Oh, and the clean up. Don’t get me started on the clean up.
When we purchased our home a year and a half ago one bedroom had a board and one full wall of wallpaper, a bathroom had a boarder, and to our surprise another bedroom had TWO LAYERS thick of wallpaper. We tackled the bedroom that only had one full wall of wallpaper and the bathroom with the boarder. I used a steamer, which seemed to help a little, however it was blasted hot! Here we are a year and a half later and I hadn’t touched the two layer thick bedroom.
I really wanted to work on the other bedroom, but the though of not only pulling one layer thick of wallpaper, but two, was daunting. At one point the hubba hubba suggested re-sheet rocking, however after he considered the amount of time it would take he pulled that offer off the table. So here I was, I had a bed, dresser, and chair with nowhere to put them. I sucked it up and started working on the wallpaper.
At first I went for what I knew, using the steamer. Of course, I was going at the same snail pace as before. The hubba hubba noticed me struggling so he jumped in and after about 5 minutes he was coming up with ideas such as putting paneling over and I vetoed. I gave it a rest but got up the next day and kept pulling. Again, the hubba hubba joined me and asked if there was a spray that we could use to help remove the wallpaper. When we did the other bedroom I did buy a spray but didn’t use much of it, honestly, I don’t remember why. I grabbed what we had and the hubba hubba followed behind me using the spray and a scraper.  I’ll be darn it was working!
            Seven hours, 5 bottles of the wallpaper removal, 4 trash bags full of wallpaper scraps (even the penny size ones!), and a few sore hands we were finally wallpaper free! So what is this magical wallpaper removal spray? Piranha Wallpaper Remover. We purchased our bottles at Lowes for about $7 a piece and it was worth every penny.
            How’d we do it? Since we had two layers I pulled the first layer that fortunately pulled the backer with it. I then used the scrapper to get under the second layer pulling facing however it left the backer on the sheetrock. The hubba hubba followed behind me spraying the backer left on the wall almost soaking it. He then used the scrapper to “push” the backer in rows and it just peeled off the walls.
            In the end, I am glad I didn’t give up on getting rid of the wallpaper. Anyone who has ever had the pleasure of pulling wallpaper know the nightmares they can cause. The Piranha and help of the hubba hubba helped tremendously. Don’t have a hubba hubba? Call a few girlfriends and offer them some cookies and wine.


Rather Be Junkin' <3
Heather


Wednesday, January 7, 2015

Junkin' Tips

Hey Ya’ll!

During my junkin’ adventures I’ve come up with a few tips that make junkin’ easier and safer! Check out the 5 tips below!


Tip #1: Wear tennis shoes or boots. Depending on where you go, especially junkyards, there may be broken glass or metal that could cut your feet.
Tip #2: Take gloves. Some items can be in really bad shape, have sharp edges, or even a nail hanging out, wear gloves to protect your hands just in case.
Tip #3: Bring a camera. There have been times that I haven’t taken pictures of some of my finds. I get home and start thinking about them and wish I would have taken a picture so I could decide if I really want it. Having a photograph can jog your memory and help you decide.
Tip #4: Buy it if you love it. If you see something you really like, buy it. I know this defeats Tip #3, but I’ve been fortunate enough to be able to go back and buy stuff I wasn’t sure of. That isn’t always the case at some places.
Tip #5: Bring a truck. Maybe even a trailer, too. Who knows, you might find a bigger piece than will fit in your car.


Those are my tips! Let me know if you have any additional tips from your junkin’ adventures!

Rather Be Junkin <3
Heather